Installation of JDK software and set JAVA_HOME
Overview
This document is related to setting up the test environment for Automation in Breeze. In this document we will discussed the installation of Android Studio, Appium and other dependency for setting the test environment.
List of software need to install and setup
- Java
- Android SDK (Android Studio)
- Node.js
Installation of JDK software and set JAVA_HOME
We can install the JDK software from the given link and start the installation.
https://www.oracle.com/java/technologies/downloads/archive/
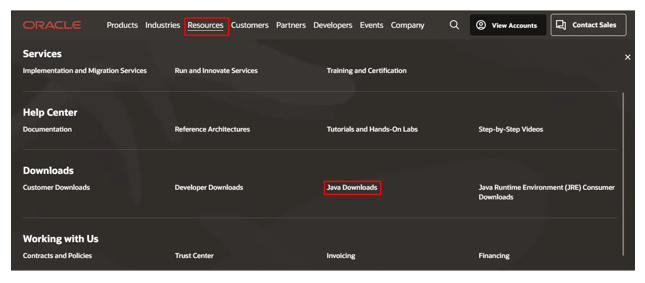
once the link is open then follow the step for downloading and installation.
- Click on Resources
- Click on Java Downloads
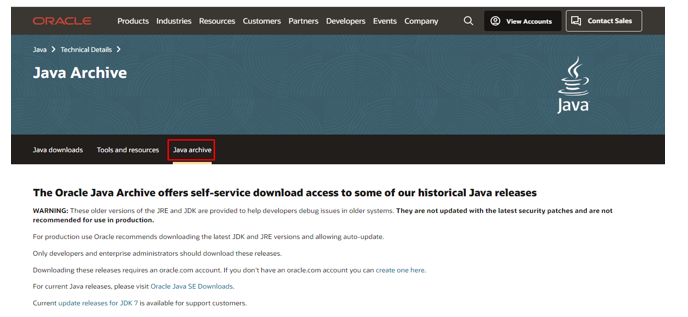
- Click on Java Archive
- Click on Java SE8 (latest version )
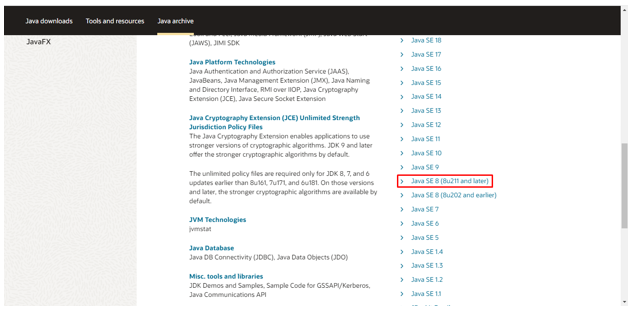
- Click on jdk windows according to computer/Laptop bit (32/86 bit,64 bit)

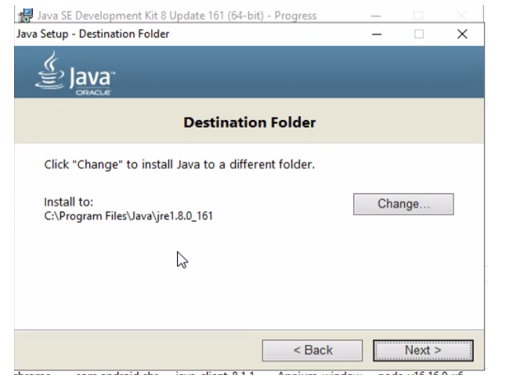
Once it is downloaded, the downloaded file is available in Download folder. Go to download folder and double click on the JDK file.
- Click on Next for Installation.
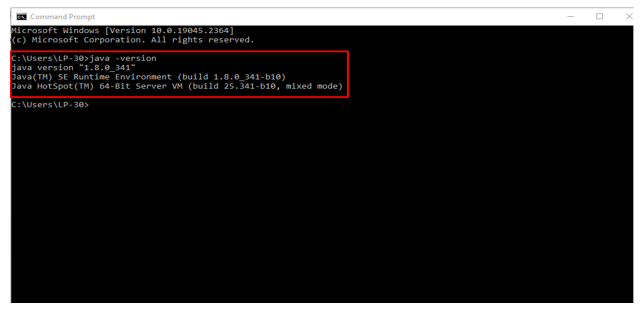
Once the java is installed user can verify it by Command, for verifying the
Goto to Run and search Command Prompt and click Enter and type java –version.
Setting up Java_Home
For setting up the Java_Home for Automation user need for follow the following steps.
- Right click on This PC.
- Click on Properties.
- Click on Advance System setting.
- Click on Advance (pop up box)
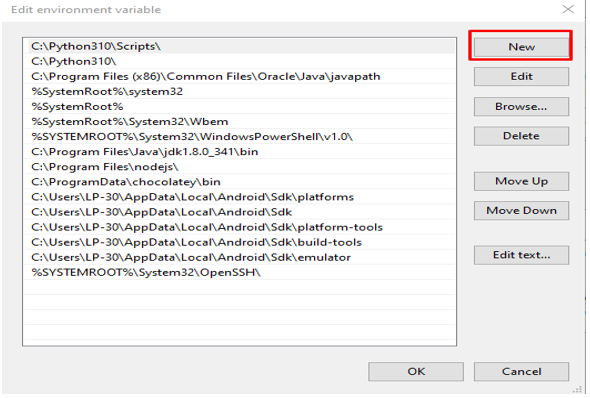
- Click on Environment Variable
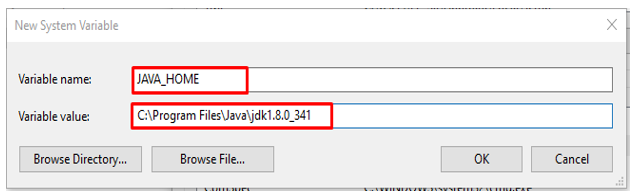
- Click on New in System Variables

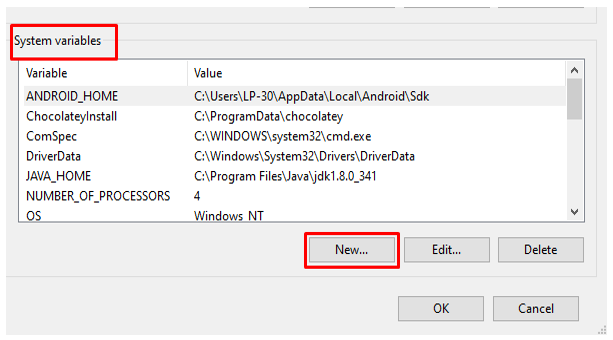
- Give the Variable name as JAVA_HOME and Variable Value as location for java where user has install. Or user can click on Browser Directory and select the location.
- Then click ok to save the changes.
Installation of Android Studio and Set-Up of ANDROID_HOME
In this Topic User will download and install the Android Studio. The installation
Of Android studio is explained step by step.
- Goto to the given link:- https://developer.android.com/studio
- Then click on download Android Studio.

- Click on check box for teams and condition and then click on download Android studio.
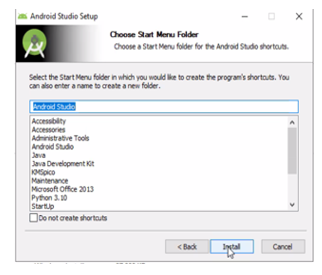
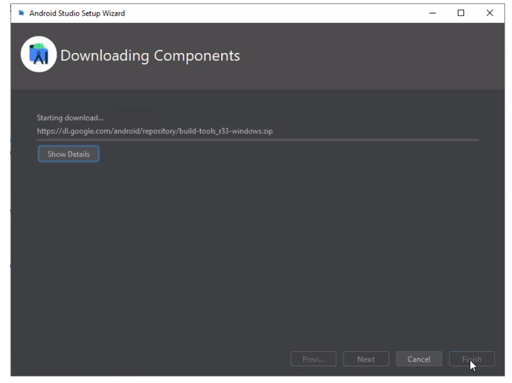
- Once it is downloaded it will be available in Download folder, Double click on the android exe for starting installation.
- Once Installation process is started then click on Next Button.

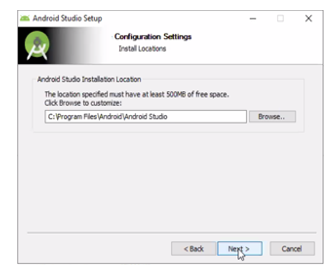
- Here select the missing SDK and then click on Next Button


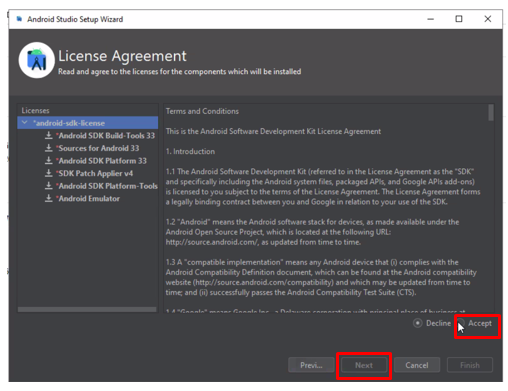
- Select License Agreement as Accept and click on Next.
- After this download of Sdk and installation is done.
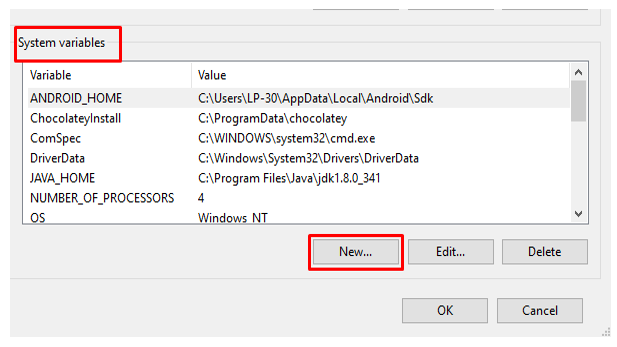
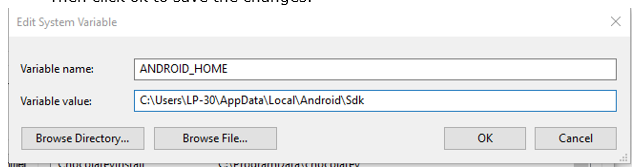
Setting up ANDROID_HOME
For setting up the Java_Home for Automation user need for follow the following steps.
- Right click on This PC.
- Click on Properties.
- Click on Advance System setting.
- Click on Advance (pop up box)
- Click on Environment Variable
- Click on New in System Variables
- Give the Variable name as JAVA_HOME and Variable Value as location for java where user has install. Or user can click on Browser Directory and select the location.
- Then click ok to save the changes.
Once Variable value is set user can verify either it is correct or not by type “echo %ANDROID_HOME%”in command prompt and get the location.

Installation of Node.js
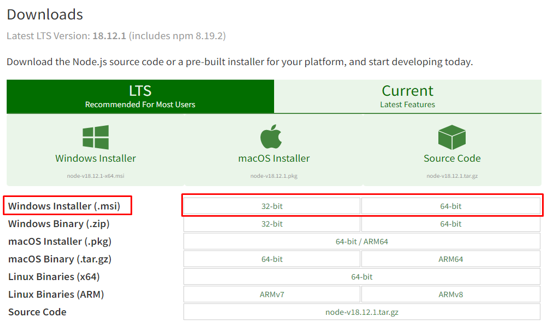
Here we will disscussed how to download and install Node.js, to download and install please goto given link:- https://nodejs.org/en/download/
- Click on 32-bit/64-bit as per system type of the user, and download the Node.js exe after download the exe will be present in Download folder.
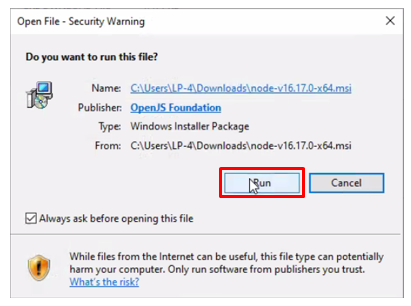
- Double click on the Node.js exe and start the installation.
- Click on Run button
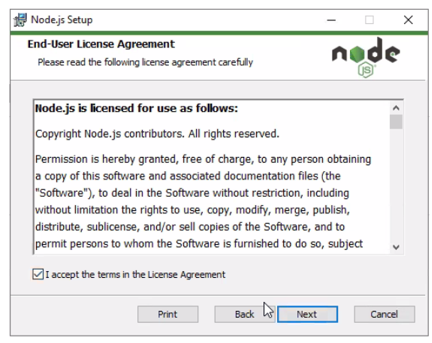
- Click on the check box I accept terms and then click on Next.
- Click on Next button

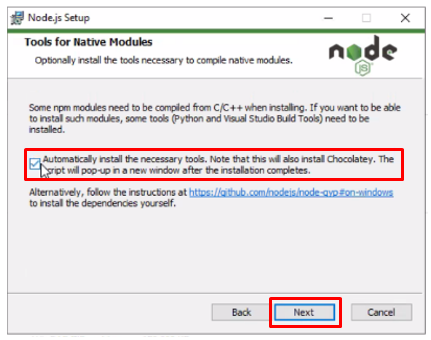
- Click on the check box for Automatically install the necessary tools and then click on Next Button
- Installation of Node.js has started

- Installation of Additional Tools started
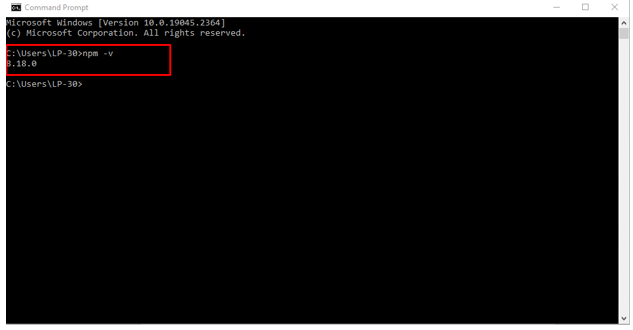
- Once the installation is done user can verif the installation by running the Command “npm –v” in command promt this command will also show the version of node installed.

- User need to open the command prompt and need to run this all command to install the tools.
- Install npm
- Install Appium
- Npm install g appium
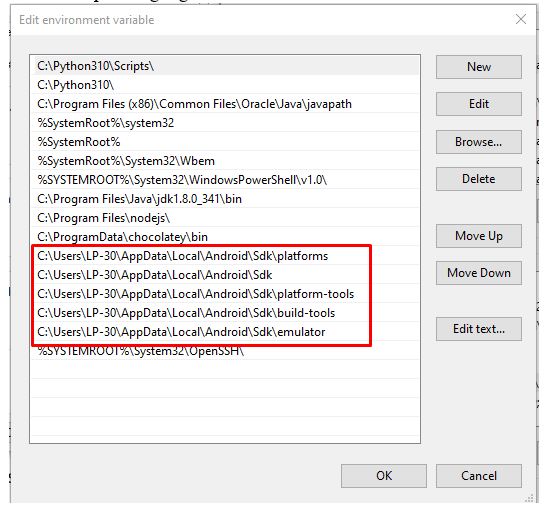
- Once all the step is done user need to set the path for all the list given:
- Right click on This PC.
- Click on Properties.
- Click on Advance System setting.
- Click on Advance (pop up box)

- Click on path
- Click on New Button and create path
- Create the path highlighted in the box